Showing posts with label follower friday. Show all posts

8.30.2013

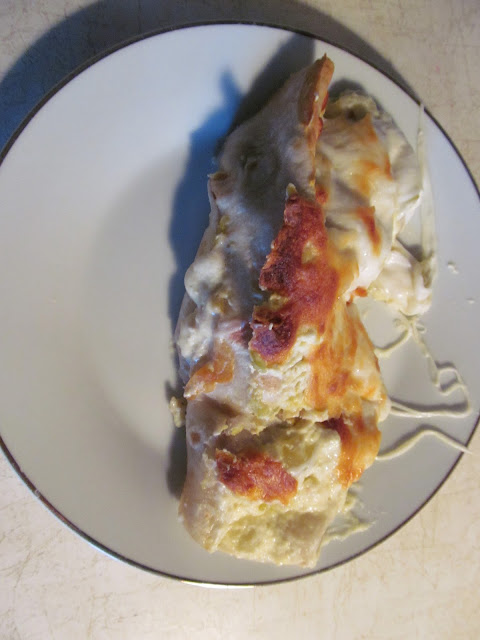
Follower Friday: Chicken Cordon Bleu Pasta

Remember how I love comfort food?  Well this dish that Candice makes is right down my alley of comfort food :) 
Candice is my cousin.  She's a year and a half younger than me but we might as well be twins.  We think a lot alike and everyone at college got us confused.  We loved that.  We got married within a few months of each other and our life goal would be to live next door to each other.  But I doubt I'm ever moving to Lund. :)  She's an amazing woman and mother.  And I wish we had more than Facetime.  Enjoy her recipe!


Chicken Cordon Bleu Pasta


What you need:
 
 
16 oz. Penne Rigate Noodles
4 boneless, skinless chicken breasts
2 15 oz. bottles of Alfredo Sauce
1/2 c. apple juice
2/3 c. milk
4 tsp. olive oil
2 tsp. butter
1 1/3 cups shredded mozzarella cheese
1 cup crumbled cooked bacon
3 chopped green onions (optional)
 
 
Heat to sizzling:
olive oil and butter 
Add:
4 boneless chick breasts, sliced and patted dry, sauté in oil & butter until tender season lightly with salt & pepper
 
 
Heat in saucepan:
Alfredo sauce
apple juice
milk
 
Add pasta and cooked chicken to sauce.  Pour into greased 9 x 13 pan. 
 

Top with:
mozzarella cheese
crumbled cooked bacon
green onions


Bake at 450 until heated through.  (Bake 10-15 minutes if sauce and chicken were hot before baking.)

11.30.2012

Follower Friday: Mint Melt Away

IT'S FRIDAY!

(Don't forget....I'm compling everyone's favorite holiday recipes for the month of December.  Hurry and send me your favorite recipe!  I'll link it back to you.  Email: willtherebefoodthere@gmail.com)

Allison was chosen to do today's Follower Friday.  Allison married my brother's best friend.  We were all at BYU-Idaho together and I remember when she started dating her husband.  I kept hearing a lot about her and when I finally met her - I loved her  She is FUNNY, smart, creative, and an avid runner (gosh I wish I could be an avid runner!)  She has an adorable little boy.  
And....they live 2,000 miles away from me.  So sad.

ENJOY HER RECIPE!

----------------------------------------------------

First off, thanks Tiff for the opportunity to do a post.  What a wonderful time of year to be featured on a food blog. Thanksgiving and Christmas are so much better with yummy food/treats. I don't know about anyone else but this is my favorite time of year for baking treats. I try to give them away to neighbors or friends so that I don't end up eating all of them, but I'll be honest, that is one of the reasons that I run, so that I can indulge sometimes all the time on delicious goodness.

One of my favorite Christmas cookies to make/eat since I was little is called the Mint Melt-Away.  It has a nice combination of chocolate and mint, and who doesn't love that combo? (Ok maybe some don't but I love it).

Mint Melt-Away

3/4 C butter
1 1/2 C dark brown sugar
2 Tbsp water
2 C semisweet chocolate chips
2 eggs
2 1/2 C flour
1/4 tsp. baking powder
1/2 tsp salt
1 lb of Andes mints broken in halves  
(you could also use the crushed Andes mints in the chocolate chip aisle)


Cook the butter, sugar, water until melted, add chocolate chips until melted.  Remove from heat.  Pour into mixing bowl.  Let stand for about 10 minutes then mix at high speed.  Add the eggs.  At lower speed, add mixed dry ingredients.  Blend until just blended.  Chill for 1 hour.  Line cookie sheet with foil.  Place small balls 2 inches apart.  Bake 350° for 12-13 minutes.  Place 1/2 of Andes' mint on hot cookie, right from the oven.  When melted swirl around on top of cookie with spoon, end of knife, or toothpick.

P.S. You are more than welcome to follow me and my shananigans on my blog here .

11.23.2012

Follower Friday: Blueberry Scones

How was your Thanksgiving?!?!  But more importantly how is Black Friday going?  Are you out there getting those toys for your kids or awesome electronics?  I love Black Friday.  The thrill and excitment of trying to get the hot item...just too much to handle! :)
 
Today's post belongs to Shelley.  I met Shelley at BYU-Idaho.  We were in at least 2-3 classes together - the first being Child Development.  I thought she was beautiful and smart.  I was a timid freshmen and was amazed how she wasn't afraid to share her opinions. I also remember walking by her and her future husband sitting on a bench together.  They were holding hands, smiling, and I could see the happiness and love they had for each other.  I remember thinking I wanted that one day ;)  Anyway - it's all yours, Shelley!
 
--------------------------------------------------------

Yay for Follower Friday! I think I might love food as much at Tiffanie. Might being the operative word. :) Love ya Tiff! Thanks for letting me do this post!

I love November. Crisp nights. Sweaters. Maybe the first snowfall. I love Thanksgiving and getting ready for the holidays. I love Thanksgiving so much that I decided to have a baby on Black Friday last year. Wasn't that nice of my nine-pounder to wait until after the turkey and pie were consumed? 

Thanksgiving can also be a little stressful. I guess it depends on who you have Thanksgiving with. I don't have any horror stories of crazy family feuds during the holidays, but planning a huge meal with all the fixin's can be overwhelming.

I suggest a little therapy. My husband is in his last year of medical school, which means one things:
(As Oprah would say)
WE PO'
(Translation: We're poor)
Nope, can't afford real therapy, or even a day at the spa. My therapy is baking. Ahhhh. Nothing better than mixing ingredients into something truly delicious, and piping hot from the oven.

This recipe is my all-time favorite therapy. Warm scones, like true love, can conquer all!

Blueberry Scones
(From Better Homes and Gardens)


Ingredients:
2 1/2 C. all-purpose flour
2 T. sugar
4 t. baking powder
1/4 t. salt
1/3 C. butter, cut into pieces
2 beaten eggs
3/4 C. whipping cream
1/2 C. blueberries
Milk
Sugar


1. In a medium bowl combine flour, the two tablespoons sugar, the baking powder, and salt. Using a pastry blender, cut butter until mixture resembles coarse crumbs.
Or if you don't have a pastry blender, use two knives to cut in the butter like this:

Make a well in the center of flour mixture; set aside.


2. In a medium bowl combine eggs, whipping cream, and blueberries. Add egg mixture all at once to flour mixture. Using a fork, stir just until moistened.


3. Turn dough out onto a lightly floured surface. Knead dough by folding and gently pressing dough for 10 to 12 strokes or until dough is nearly smooth. Pat or lightly roll dough into an 8-inch circle. Cut into 8 wedges.


4. Place wedges 1 inch apart on an ungreased baking sheet. Brush wedges with milk and sprinkle with additional sugar.


5. Bake in a 400 degree oven for 12-14 minutes until golden brown. Remove scones from baking sheet; SERVE WARM!


Mmmm... Warm scones with a mug of hot cocoa and a good book... Sounds like the best kind of therapy there is! Enjoy!

11.16.2012

Follower Friday:Oatmeal Banana Pancakes

Remember how I taught special education for a year?  Michelle was a speech therapist at one of the schools I serviced.  She was amazing!  I was always impressed by her knowledge of language in my little preschoolers.  She was always someone I could turn to and not just for intervention questions.  Enjoy her recipe!

-------------------------------------------------------------------


I am a breakfast food freak.  Too many times a week my husband and I joke about going to Kneaders or IHOP for breakfast.  Maybe 1 out of 30 times we actually go.  But I have discovered this deliciously gratifying pancake recipe and I gotta say - I am totally hooked.  It involves making a big ole' batch of dry  pancake mix to use, the recipe of which I got from Mel's Kitchen Cafe (Great site - check it out!).  It might seem daunting but it's totally easy and it lasts a LONG time.  Then all you need to make 10 deliciously healthy, fibrous pancakes is 1 cup of the mix, 1 cup of buttermilk, and 1 egg.  See, easy! Here's what you'll need:

DRY MIX INGREDIENTS:
3 1/2 cups quick oats
3 cups whole wheat flour
2 cups all-purpose flour 
3 tablespoons sugar
3 tablespoons baking powder
1 tablespoon salt
1 tablespoon baking soda
1 cup vegetable or canola oil
DIRECTIONS:
Mix all the dry ingredients together in a nice big bowl. A stand mixer would be nice but it's easy enough with a big spoon.  You can leave the oats whole or you can blend them.  Depends on what consistency you like.  I kind of like the lumpiness but some people don't.

 After the dry ingredients are mixed, slowly add the vegetable oil while you stir it up.  It should now look a little bit more like sand that is almost dry.  It will look kind of like this when you squeeze it in your hand: 
 
You can store it in an airtight container for up to two weeks at room temperature or indefinitely in the refrigerator or freezer. I keep it in a container like this and just taped the recipe right on it. 
To make the pancakes, simply combine 1 cup of mix, 1 cup of buttermilk, and 1 egg together. It will make about 10 medium-sized (using 1/4 cup) pancakes.  Or 8 medium ones and a big Mickey Mouse one.
 It's always the perfect amount for me, my husband, and our 3 year old, with one or two to spare.  
Now here's a fun variation.  Add some mashed up banana to the wet mix to make banana pancakes.  Then make your syrup a billion times better by adding about 1/2 cup of peanut butter to 1 cup of maple syrup.  Melt it all together in the microwave. Dip your finger in it, take a lick, and then wonder why you hadn't thought of it before. Enjoy!!

-------------------------------------------------------
PS - I made a batch of these earlier this week.  We've had them for breakfast twice and dinner once - so delicious!

11.02.2012

Follower Friday: Sour Cream Enchiladas

Happy Noevember!
How was your Halloween?
I'm already thinking about all the yummy things I want to make for Thanksgiving.  No lie.

So for today's Follower Friday we have....
SHALISHA
Shalisha is my ALL time favorite person in Logan, UT.
She was twin boys a few months older than my little boy.
Her and I think the same on practically every subject in life.
We both love food, dramatic TV series, and a good young adult book.
We were sisters in Heaven, I just know it!
She makes almost everything from scratch and bread all winter long.  She's my hero.
Enjoy her recipe!

----------------------------------------------------------------
Hey everyone! I am so excited to be on Tiffs Blog. 
She is an amazing, loving friend and I dont know where or who I would be without her...
I cant wait to share this recipe with you all...
So I know that alot of you probably have a favorite recipe that your mom or dad used to make for you when you were growing up and when ever you make that recipe it makes you feel like being at home... well I have a couple but one of my all time favorites was SOUR CREAM ENCHILADAS so here it is...
Sour Cream Enchiladas
first off you will need the ingredients...

*1 cup of sour cream
*1 small (4oz) can of chopped green chilies
*1 (10.5oz) can of cream of chicken soup
*about 2 cups of mozzarella cheese
(or if you want you can use cheddar but I personally like the white stuff ;D)
*7 of your favorite flour tortillas (I personally like the kind you have to cook first)
* 2 small or 1 large chicken breast
* mushrooms (I like to use fresh mushrooms but you can use the canned)
*1 tsp garlic

ok now we make the food...
first I cook the chicken breast/s by chopping it/them into small pieces that i throw into a frying pan with a little olive oil and the garlic... cook on low until no longer pink...(sorry I didnt take of pic of the chicken :()

While the chicken is cooking whip together the sour cream, cream of chicken soup, & the green chillies
Then once the chicken is cooked and the sauce mixed, I start to put everything together (I almost forget this is when I preheat the oven to 350 degrees)


Put some chicken, mushrooms (until all gone), cheese and sauce (about 1 TBS) on to each tortilla...
Roll the tortillas like so
Place tortillas into a backing dish (I personally like my smaller dish better but if you want yours to be alittle more spread out and have a 9x13, then use it)
Spread the remaining sauce evenly over the top of your tortillas.
Add as much cheese on top as you want.
  Throw it into the oven for 45 mins.
After 45 mins it should come out golden brown on top with gooey cheesy yumminess inside.
Serve with rice and your favorite vegetable and ENJOY....

------------------------------------------------------------------
Thanks Shalisha!  Have a good weekend everyone! 

AND...are you following this blog yet?  
 Have you grabbed a button or badge for your blog?!

10.23.2012

Follower Friday: Ham Pastries & Pumpkin Pie Cake


(Sorry for missing a few posts and for posting a FF on a Tuesday but I didn't want Nickie's yummy recipe to have to wait another day.  Blogger and I kept having problems.  But I think I've figured it out so we're back on schedule starting tomorrow. Continue to check for new recipes on MWF!  And, have you seen the NEW buttons on the side - compliments to Caley.  A new button to help share the food love and a button if you've been featured on this blog.  Grab it!  You know you want to brag to your friends.)


I was a special education teacher for preschoolers for one year.  Did you know that?  It was quite a roller coaster ride.  And Nickie was a first year teacher to that district as well.  That alone sealed the deal for our friendship.  We relied on each other (along with 5-6 other newbies) to survive through that year.  She continued on after I had my first baby.  And I'm amazed at what an incredible and hard working teacher she is.  I hope to one day be the teacher she is now!  Enjoy her recipe.
 
----------------------------------------------------------------------------------------------------------------

Fall is in the air and while I wish I could say I am most excited about pumpkins, scarecrows, and everything fall-themed, mostly I just can’t stop craving some down home Midwestern comfort food.  Born and raised in South Dakota, my fall and winter diet consisted of various hot dishes” and casseroles that always seemed to hit the spot (and also tip the scale).  With my little family battling the “post-baby bulge” hardcore, I’ve included a few dishes that satisfy my comfort food craving without adding to the waistline—and in no way resemble something that could be mistaken for a “hot dish”…!

Ham Pastries:
Items Needed:
 
2 pkgs of crescent rolls*
1 pkg cream cheese softened*
2 T. softened butter spread*
2 T. milk*
1-3 T dry onion soup flakes
¾ C. cubed/chopped ham
(*I use the fat-free or reduced fat versions of these items.  It’s even more delicious when you use the full-fat version, if your metabolism allows…!)

Preheat oven to 350 degrees.

Combine the cream cheese, butter spread, and onion soup flakes.  (Depending on how much you like the onion soup flavor, you may want to add anywhere from 1 T to 3T, depending on taste!) Beat until smooth.  Fold in ham.  Set aside.

On a non-stick baking/cooking sheet or tray, prep dough by taking two triangles of the dough and pinching them together to make a rectangular shape.  


On one side of the rectangle, place a scoop of cream cheese mixture.

 
Next comes the tricky part… not eating all the crescent roll dough.  Ha!  Just kidding (but not really). Fold over the empty side of the rectangle over the cream cheese mixture to create a little square-ish pocket. With a fork, press along the three outer edges to prevent the cream cheese mixture from oozing out when baking.  (I swear, no matter diligent you are in doing this, some of the cream cheese mixture will escape.) It’s also tough to make them perfect-looking so just do the best you can!

Bake at 350 degrees for 18-20 minutes or until the dough begins to turn golden brown. Let cool for a few minutes before you eat—the cream cheese mixture inside is HOT!
(While the pastries are cooking, I usually use some of the remaining onion soup flakes to season some green beans for a tasty little side.  On this particular day, I steamed some green beans and mixed them with a little butter spread and dry onion soup flakes.  I then topped them off with some pepper, parmesan, sliced almonds, and bacon crumbles.  Looks fancy, tastes great—and very little effort!)

ENJOY!

 
AND FOR DESSERT: Pumpkin Pie Cake!


1 1/2 c. sugar
1 tsp salt
2 tsp cinnamon
1 tsp ginger
1/2 tsp ground cloves
4 eggs
1 can pumpkin (29 oz.)
1 can evaporated milk*
1 container whipped cream*
 
CRUMB TOPPING
1 dry yellow cake mix
1 cube melted butter*
(optional low-fat or fat-free ingredient)


Directions:
Mix all ingredients together EXCEPT crumb topping ingredients and whipped cream. Pour mixture into 9x13" pan. (Note:  I made a half recipe in my pics shown below—great for a smaller family.  Or a midnight snack. Don’t judge…)
Next, in a separate bowl, prepare crumb topping by mixing dry cake mix and (cooled) melted butter.  Sprinkle crumb topping over mixture.
 
Bake at 350 degrees for 35-40 mins or until crumb mixture begins to turn golden brown..

Once cooled completely, frost cake with whipped cream. Best when served with hot cocoa and other fall favorites—

---------------------------------------------------------------------------------------

YUM! Thanks Nickie.

10.12.2012

Follower Friday: Peanut Butter Cup Cookies

 
Today's post belongs to Laura.  We've been friends since we were 13.  We both grew up in PA - yeah!  And even after we went to college (four hours apart in the West) we still made it a priority to see each other every couple semesters.  She's beautiful, creative and I've always been jealous at how comfortable she is in any situation.  She also has her own food blog - check it out!

--------------------------------------------------------------------------------------------------------


I feel so honored to be featured on Tiffanie's blog!

My name is Laura Larson,
  And Tiff and I met many years ago at girl's camp.

Funny story actually!
During our 1st year at girl's camp,
she totally (accidentally) walked in on me in the bathroom.
Awkward!
We didn't exactly strike up a conversation right then and there.

So it wasn't until the following year that we made the connection 

"Hey, you're that girl who...."

And we've been really good friends ever since!

She makes me laugh more than any girl I know!
I admire how she's always been herself 
and well, she's just Fabulous!

Anywho, enough about Tiff! :)

This cookie recipe that I'm featuring is one of my top 3 favorite holiday cookies ever!
My mom made it one Christmas and I've never forgotten it. 

I mean look at it, this is a decorative cookie that can be used for either
Halloween, Thanksgiving or Christmas.

I have a blog called The Cookie Jar, All things BAKING, that you can visit HERE.
Please come by and visit for more cookie recipes or pies, breads, muffins etc.

Or simply to say hello. I'd love to meet you!

Thanks for having me Tiff!

Ingredients:
makes 3 dozen
1 cup semi-sweet chocolate chips
2 squares (1 ounce each) unsweetened baking chocolate
1 cup sugar
1/2 cup butter or butter shortening
2 eggs
1 t. salt
1 t. vanilla
11/2 cups + 2 tablespoons all-purpose flour
1/2 t. baking soda
3/4 cups finely chopped peanuts
36 miniature peanut butter cups, unwrapped
 Instructions
  1. Microwave 1 c chocolate chips and 2 squares (1 oz each) baking chocolate for 2 minutes. 
  2. Repeat until smooth (or melt on rangetop in small saucepan on very low heat).  
  3. Allow chocolate to cool slightly.
  4.  In a separate bowl combine sugar and 1/2 cup butter in large bowl. 
  5. Beat 1 c sugar and 1/2 c butter.  Beat in 2 eggs, 1 tsp salt and 1 tsp vanilla.
  6. Add melted chocolate slowly.  Mix until well blended.
  7. Stir in 1 1/2 c + 2 Tbsp flour and 1/2 tsp baking soda. 
  8. Shape dough into 1 1/4 inch balls.  Roll in nuts.
  9. Place 2 inches apart on baking sheet lined with parchment paper or silpat.
  10. Bake at 350 degrees for 8-10 minutes.  
  11. Immediately after taking out of oven, Press peanut butter cup into center of each cookie
  12. Cool 3-5 minutes on baking sheet before removing to cooling rack.
Drizzle
  1. Place peanut butter chips in heavy resealable sandwich bag. Seal. 
  2. Microwave for 1 minute.  Knead bag.  
  3. Repeat until smooth (or melt by placing bag in hot water). Cut tiny tip off corner of bag. Squeeze out and drizzle over cookies

Microwave 1 c chocolate chips and 2 squares (1 oz each) baking chocolate for 2 minutes. 
Repeat until smooth (or melt on rangetop in small saucepan on very low heat).  
Allow chocolate to cool slightly.

 In a separate bowl combine sugar and 1/2 cup butter in large bowl. 
Beat 1 c sugar and 1/2 c butter.  Beat in 2 eggs, 1 tsp salt and 1 tsp vanilla.
Add melted chocolate slowly.  Mix until well blended.
Stir in 1 1/2 c + 2 Tbsp flour and 1/2 tsp baking soda.
Shape dough into 1 1/4 inch balls.  Roll in nuts.
Place 2 inches apart on baking sheet lined with parchment paper or silpat.
Bake at 350 degrees for 8 minutes.

Immediately after taking out of oven, Press peanut butter cup into center of each cookie
Cool 3-5 minutes on baking sheet before removing to cooling rack.


Drizzle
Place peanut butter chips in heavy resealable sandwich bag. Seal. 
Microwave for 1 minute.  Knead bag.  
Repeat until smooth (or melt by placing bag in hot water). 
Cut tiny tip off corner of bag. Squeeze out and drizzle over cookies.


---------------------------------------------------------------------------------------------------------

Chocolate and peanut butter...my favorite dessert combination!
HAPPY WEEKEND! :)

10.05.2012

The BEST Pumpkin Cookies

I'm REALLY excited about today's post!  My older sister, Rachelle is amazing.  She's creative, an avid runner, makes yummy and healthy food.  She's hilarious and happy.  I'm jealous of her photo taking, blog posting, and let's be honest, she's gorgeous. :)  So just trust me when I say...make these dang cookies and any other recipes on her blog.  Because they will be LEGENDARY! (reference, anyone?)

----------------------------------------------------------------------------------------------------------------

With temperatures falling and Halloween right around the corner all I can think about is cookies. Pumpkin cookies to be exact. This recipe is to die for! It's a bit different from the traditional pumpkin chocolate chip cookie recipe everyone makes. Don't get me wrong, I love those. But this one is a bit fancier I think with the frosting on top and these cookies will melt in your mouth! Be prepared to eat a lot. And have some milk close by.

Pumpkin Cookies with Penuche Frosting

1 c butter
1/2 c brown sugar
1/2 c white sugar
1 egg
1 tsp vanilla
1 c pumpkin
2 c flour
1 tsp b. powder
1 tsp. b. soda
1/2 tsp. cinnamon

Cream together butter and sugars. Scrape down sides of bowl and mix in egg and vanilla. Mix well and scrape down bowl again and then add your pumpkin. Give it a good mixin', scrape down bowl and then add your dry ingredients. Now mix it up until it is just combined. Don't overmix this.


Drop by spoonful on parchment lined cookie sheet.

Bake at 350 for 10 -12 min. My oven was more towards the 12 minutes time. They will be very soft, don't over bake. Let cookies cool.

While baking the rest of your cookies you can whip up the frosting.

Penuche Frosting:
6 Tbsp butter
1 c. brown sugar
1/2 c milk
3 - 4 c powdered sugar

Mix butter and brown sugar on stove top. Bring to a boil and boil one minute. Take off stove and let cool for 10 minutes.


 Then add your milk right into the pan and stir it up real good. You might have to scrape the edges of the pan to get all that butter/sugar goodness. It will mix up smooth so just keep mixing. Then pour over your powdered sugar and give it a good stir so it looks like so.


Next frost your cookies!!

Take to a Halloween party, eat them all by yourself, or give them to a friend.
Happy October!

9.28.2012

Follower Friday: Cowboy Potatoes and Barbeque Chicken

The person chosen for Follower Friday is Shaylin!  We have a lot in common.  We both went to BYU-Idaho and studied to be teachers.  She married my brother's best friend.  (I didn't marry him too - but that's how we originally met!)  We both live in Utah and have daughters named Paige.  I wish we lived closer, but sadly we don't.  It's all yours Shaylin!

------------------------------------------------------------------------------------------------------------------

Hi Tiffanie!  I am so excited to share a recipe with everyone today! My name is Shaylin and I LOVE to cook yummy, easy food!  Especially food that gives my family of four lots of leftovers for the week! I also really like food that I can prepare in the morning so that it's done just in time for dinner without too much fuss.  Plus, having yummy smells in my house all day is always a plus.  Today we are making a recipe that I learned from my mom - one of our favorites!

Cowboy Potatoes and Barbecue Chicken
What you need:
1 lb bacon
1/2 yellow onion, chopped
1/2 small bag of baby carrots
6-8 red potatoes, washed and scrubbed
1/2 bag of frozen peas
1 cup grated cheddar cheese
3 frozen chicken breasts
1/2 bottle of your favorite barbecue sauce

 Cut the bacon into 3/4 inch pieces and cook in a frying pan until almost done.  Add the chopped onion and cook until the onions are nice and soft.

While that is cooking, cut the potatoes and carrots into bite size pieces and put them in your crock pot.

When the bacon and onions are done, dump them into your crock pot too - bacon grease and all.  Yummy!  Cook this in your crock pot on high for about 7 hours - or until they are nice and soft.
When they are soft, add the peas and cook for another 20-30 minutes.  Finally, add the cheese and let it cook just long enough for the cheese to melt on top.

After you get the potatoes and carrots cooking for the day, put the frozen chicken into a baking dish and cover it with the barbecue sauce.  Add about an inch of water to the bottom of the baking dish - you don't want your chicken to dry out!

  Cover with aluminum foil and bake in the oven at 275 degrees for 6 to 7 hours. It should easily fall apart when it is done.

As far as I'm concerned - these two items ALWAYS go together - they are just so good together.  Whip up a salad or some rolls and you have a dinner to die for!
-----------------------------------------------------------------------------------------
Looks delicious!  The PERFECT meal for a crisp fall day.  The bacon won me over :)  Happy weekend!