10.31.2012

Pumpkin Chocolate Chip Cookies & Happy Halloween!

Happy Halloween! 
What are you doing today?
I'm taking my children trick or treating and to a church party!
They might not sleep after all the sugar.
I made their costumes - Peter Pan and Tinkerbell.
So I need to show them off more than once.

In case you're looking for a last minute treat for this evening,
(because I'm sure no one has enough sweets in their house already!)
here is my favorite Pumpkin Chocolate Chip Cookie recipe!


Pumpkin Chocolate Chip Cookies
1 1/2 c. sugar
1/2 c. butter
1 egg
1 1/2 c. canned pumpkin
(if you have a large can of canned pumpkin,
measure out into 1/2 -1 cup portions and freeze in sandwich bags for later!)
1 tsp. vanilla
2 1/2 c. flour
1 tsp. baking powder
1 tsp. baking soda
1 tsp. salt
1 tsp. nutmeg
1 tsp. cinnamon
1 c. semi sweet chocolate chips

Preheat oven to 350 degrees.  Cream butter and sugar.  Beat in egg, then pumpkin, then vanilla. 
Combine flour, baking powder and soda, salt, nutmeg, and cinnamon in a separate bowl.
Gradually add to creamed mixture.
Stir in chocolate chips.
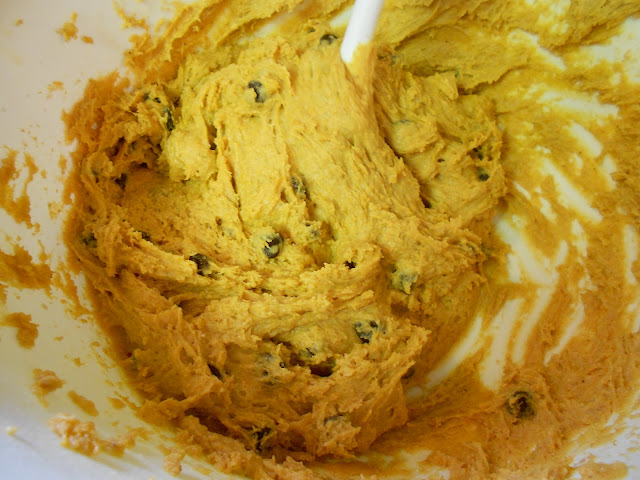
Drop teaspoonfuls onto greased cookie sheet. 
these are definitely NOT teaspoonfuls.  I like a BIG cookie!
Bake for 12-14 minutes or until light brown.  Cool or wire racks.

ENJOY!  
And Happy Halloween!

10.29.2012

AMAZING Pizza Sauce

 I had this obsession with wanting to make homemade pizza and trying to find the perfect recipe. 
Well I found it.  It was on my friend, Steph's blog.  Wanna hear a cool story?

She was my EFY counselor when I was 16.  She quickly became my role model and after EFY we kept in touch.  I went to her wedding reception, she came to mine.  She bought me Yahtzee.  Funny that I remember that?  Anyway, our friendship carries on.  And her pizza sauce recipe is only one of her many recipes I have fallen in love with.  Check out her blog.

Steph's AMAZING Pizza Sauce
1 6 oz. can tomato paste
1 1/2 c. water
1/3 c. olive oil
1/2 T garlic powder
1/2 T oregano
1/2 T. basil
1/2 T. rosemary
Salt and pepper to taste

 Mix paste, water, and olive oil well. Add the remaining spices.


 Mix well. Refrigerate in an tight container for several hours before using. It puts off a strong, yet yummy smell - so that's why I say use a tight container!


 It stays fresh in the fridge for about 3 weeks.  It will get thicker after it sits in the fridge.  Add a little olive oil and water to thin it down.  Plus if you don't use it all for pizza night, there are so many other ideas - pizza sandwiches, English muffin pizzas, etc.

10.26.2012

Follower Friday: Vegetable Soup

Dawnelle is someone I "know of" through my friend Caley.
I have heard amazing things about this girl!  I can't wait to make this soup recipe...
just take a look at the pictures! Yum!  Enjoy the recipe and be sure to check out her blog.

-------------------------------------------------------------------------------

My name is Dawnelle and I write over on Just Dawnelle about my life, my little loves, and my love for design. I'm super excited to be here with Tiffanie for Follower Friday!

I have a thing for food. I won't lie. Good food... you know the kind that just makes you wish you could start your meal all over gain? I also love cooking. My family cooks together often and it has got to be one of my very favorite things to do together!

So are you ready for the perfect cozy fall soup recipe??

I have a thing for vegetable soup... not the kind with noodles... or the kind with rice... or the kind with beans... but good old fashion hearty vegetable soup just like Campbells! The no fail, super easy, delicious kind! Are you ready for this goodness??


Ingredients
1/4 Cup Olive Oil
3 large carrots, diced
2 stalks celery, diced
1 small onion, diced
6 medium potatoes, diced
1 can peas
1 can corn
1 can green beans
3 cups diced canned tomatoes
12 cups of chicken stock (or water with bullion cubes)
1/2 tsp basil
1/2 tsp thyme
1 Tbs salt
1/2 tsp black pepper


Begin by dicing up the carrots, celery, and onion and saute them in the olive oil. Now you don't have to use olive oil but if you have it, use it... it just makes everything better! Promise!


Once they're all cooked up nice and good (you know so the onion is translucent...) so it's all steamy and loud and smells absolutely amazing... like this (oh if only you could smell it!)


You add the broth. Now let me give you my two cents about the broth... I didn't use actual chicken broth. I usually don't. I used water and bullion cubes. But I won't use any bullion cubes, I only like to use the bullion cubes found in the international foods isle like the Knoll or Maggi cubes. The other thing, sometimes when I make it, I don't use chicken bullion. Maggi makes a tomato vegetable bullion that is fantastic!! Okay... soap box is being put away... 

you add the broth...


and then let it boil! Once it starts to boil, take those nicely diced potatoes (I used red potatoes because I was hungry and wanted the soup to cook faster... and they're a softer potato so they cook faster.)


Let those potatoes cook in there for about ten minutes or so and then add the rest of the beautiful vegetables.


and add those spices... the glorious spices!! Don't you dare forget the thyme... it totally makes the soup! Plus, if you thought it was smelling good before, it is going to be absolutely incredible now!!


Then just let that little... well now... big pot of soup cook away!! Sometimes it needs more broth than others... depends on how thick or thin you like your soup. I like it nice and brothy (is that a word?) so I always add a little extra sometimes.

Check those potatoes after a little while... if you can stick a fork in them... your soup is done!! Eat it up... enjoy it!!

See all those little specks of oil... that's the olive oil I was talking about... they're like little morsels of savory goodness!!


Now... wasn't that easy?! and isn't it delicious!!

I have lots more fun and super easy recipes over on Just Dawnelle like this delicious Blueberry Pie and kid friendly Apple Crisp. I would love to have you hop over and visit!!

----------------------------------------------

Ingredients
1/4 Cup Olive Oil
3 large carrots, diced
2 stalks celery, diced
1 small onion, diced
6 medium potatoes, diced
1 can peas
1 can corn
1 can green beans
3 cups diced canned tomatoes
12 cups of chicken stock (or water with bullion cubes)
1/2 tsp basil
1/2 tsp thyme
1 Tbs salt
1/2 tsp black pepper

Saute carrot, celery, and onion in olive oil. Add chicken stock and bring to a boil. Add diced potatoes and cook for 10 minutes or so. Add the remaining vegetables and seasonings. Simmer for 30 minutes or until the potatoes are cooked (you can stick a fork in them). If you need to, add more chicken stock.

Thanks Dawnelle!

10.24.2012

FIVE Quick & Delicious Breakfasts

I had a request for fast, on the go, breakfast ideas.  
And from everything I've learned about eating healthy (which is very little - ha!) eating carbs for breakfast is the best time to eat them.  Also, fast breakfasts require a variety of ingredients on hand and portions or things already prepared.  
So here are my TOP five fast breakfast meals. 

1. Breakfast Smoothies
This one that I make with Wild Orange oil is delicious.
And then I love Carnation Instant Breakfast.  
On the front of each chocolate packet is a recipe for a Chocolate Banana Smoothie:  

1 packet of chocolate instant breakfast shake
3/4 cup of milk  (I use 2%)
2-3 ice cubes
half of a banana
AND I add 3-4 strawberries
*I LOVE the Magic Bullet.  It's perfect for individual servings.  
Once you blend, flip it over, top with the ring and grab and go!

(one of my daughter's favorite smoothies!)

2. Two Minute Egg Sandwich
One English Muffin
Slice of cheese (I prefer sharp cheddar)
Slice of deli ham
One Egg
Now this breakfast can quickly come together, you just have to do it in the right order ;)  Turn on stove to heat pan.  Butter the pan to cook your egg. (I like butter better than oil.)  I keep my English Muffins in the freezer to last longer. Pull one out and put in the microwave for 30 seconds.  Crack the egg into the pan and break the yolk.  Salt and pepper.  

Take English muffin from the microwave, cut and place in the toaster.  Pull out ham and cheese.  Slice a few pieces of cheese and pull out one slice of ham.  Flip your egg.  Take English Muffin from the toaster and butter both sides.  Your egg should be done by now.  Put onto one side of muffin and put slices of cheese on top. 

I didn't have cheddar cheese - oops! So I used shredded Mozarella - just as yummy!


Keep the stove on - put the slice of ham onto the pan.  Slightly brown both sides.  Place on top of melted cheese.  Top with the second piece of English Muffin.  Can easily be wrapped in aluminum foil or paper towel for the road!
Grab and go!

3. Oatmeal and Berries


I sometimes enjoy eating oatmeal.  I know it's good for me and it's filling, so I try and eat it often.  But let's be honest, I don't always have time to cook regular rolled oats on the stove.  I'm sure many of you have already figured this out.  But I started buying Plain Instant Oatmeal Packets.  I dump it into a bowl, fill with 3/4 cup of milk (yes, I use milk!) and microwave for 2 minutes.  Then I put a little more milk in it, a spoonful of brown sugar and the best part of this oatmeal...the fresh strawberries I top it off with.  If you don't have fresh strawberries, a bag of frozen berries is awesome to have on hand!  Mix a handful of berries in, stir it together and the berries will defrost in the hot oatmeal.  Grab and go!

4. Yogurt and Granola

I wish I had some amazing granola recipe; but I don't.  Do you have one you love?  Please tell me and I'll post it!  I love Yoplait Vanilla Yogurt.  I recently read an article that it has too much sugar and makes you crash later.  Dangit.  I still haven't given it up.  But if you're trying to cut back on sugar, then a different yogurt might be a better choice for you.  I love to mix that specific yogurt with berries (again, frozen berries are GREAT to have on hand) and a couple spoonfuls of granola.  I buy the Kroger Oats & Honey Granola.  It has a handful of easy to read ingredients so I figure it's legit.  
Grab and go!

5. Bran Flax Muffins
Ok this is definitely healthy.  My friend Kim would make a batch of these and then freeze them.  
If she were in a hurry, she'd pull one of these out and microwave for 30 seconds.  Grab and go!
Bran Flax Muffins


1 ½ c whole wheat flour
¾ c flax meal
¾ c wheat bran
½ c brown sugar
2 t baking soda
1 t baking powder
1 t salt
2 t ground cinnamon
¾ c skim milk
2 eggs
1 t vanilla
1 ½ c shredded carrots
2 apples, peeled and shredded
½ c chopped nuts


Directions:
1. Mix first 8 ingredients in a small bowl. 
 Mix remaining ingredients, except nuts, in a large bowl. 
 Mix the dry ingredients into the wet. 
2. Bake filled muffin cups at 350 for 15 minutes.


 AND finally...I love toast.  It's yummy and filling.  
So I usually add a piece of toast to most of these meals.  And you don't just have to top with butter.  
Peanut butter and honey is DELICIOUS for breakfast!  Grab and go!


10.23.2012

Follower Friday: Ham Pastries & Pumpkin Pie Cake


(Sorry for missing a few posts and for posting a FF on a Tuesday but I didn't want Nickie's yummy recipe to have to wait another day.  Blogger and I kept having problems.  But I think I've figured it out so we're back on schedule starting tomorrow. Continue to check for new recipes on MWF!  And, have you seen the NEW buttons on the side - compliments to Caley.  A new button to help share the food love and a button if you've been featured on this blog.  Grab it!  You know you want to brag to your friends.)


I was a special education teacher for preschoolers for one year.  Did you know that?  It was quite a roller coaster ride.  And Nickie was a first year teacher to that district as well.  That alone sealed the deal for our friendship.  We relied on each other (along with 5-6 other newbies) to survive through that year.  She continued on after I had my first baby.  And I'm amazed at what an incredible and hard working teacher she is.  I hope to one day be the teacher she is now!  Enjoy her recipe.
 
----------------------------------------------------------------------------------------------------------------

Fall is in the air and while I wish I could say I am most excited about pumpkins, scarecrows, and everything fall-themed, mostly I just can’t stop craving some down home Midwestern comfort food.  Born and raised in South Dakota, my fall and winter diet consisted of various hot dishes” and casseroles that always seemed to hit the spot (and also tip the scale).  With my little family battling the “post-baby bulge” hardcore, I’ve included a few dishes that satisfy my comfort food craving without adding to the waistline—and in no way resemble something that could be mistaken for a “hot dish”…!

Ham Pastries:
Items Needed:
 
2 pkgs of crescent rolls*
1 pkg cream cheese softened*
2 T. softened butter spread*
2 T. milk*
1-3 T dry onion soup flakes
¾ C. cubed/chopped ham
(*I use the fat-free or reduced fat versions of these items.  It’s even more delicious when you use the full-fat version, if your metabolism allows…!)

Preheat oven to 350 degrees.

Combine the cream cheese, butter spread, and onion soup flakes.  (Depending on how much you like the onion soup flavor, you may want to add anywhere from 1 T to 3T, depending on taste!) Beat until smooth.  Fold in ham.  Set aside.

On a non-stick baking/cooking sheet or tray, prep dough by taking two triangles of the dough and pinching them together to make a rectangular shape.  


On one side of the rectangle, place a scoop of cream cheese mixture.

 
Next comes the tricky part… not eating all the crescent roll dough.  Ha!  Just kidding (but not really). Fold over the empty side of the rectangle over the cream cheese mixture to create a little square-ish pocket. With a fork, press along the three outer edges to prevent the cream cheese mixture from oozing out when baking.  (I swear, no matter diligent you are in doing this, some of the cream cheese mixture will escape.) It’s also tough to make them perfect-looking so just do the best you can!

Bake at 350 degrees for 18-20 minutes or until the dough begins to turn golden brown. Let cool for a few minutes before you eat—the cream cheese mixture inside is HOT!
(While the pastries are cooking, I usually use some of the remaining onion soup flakes to season some green beans for a tasty little side.  On this particular day, I steamed some green beans and mixed them with a little butter spread and dry onion soup flakes.  I then topped them off with some pepper, parmesan, sliced almonds, and bacon crumbles.  Looks fancy, tastes great—and very little effort!)

ENJOY!

 
AND FOR DESSERT: Pumpkin Pie Cake!


1 1/2 c. sugar
1 tsp salt
2 tsp cinnamon
1 tsp ginger
1/2 tsp ground cloves
4 eggs
1 can pumpkin (29 oz.)
1 can evaporated milk*
1 container whipped cream*
 
CRUMB TOPPING
1 dry yellow cake mix
1 cube melted butter*
(optional low-fat or fat-free ingredient)


Directions:
Mix all ingredients together EXCEPT crumb topping ingredients and whipped cream. Pour mixture into 9x13" pan. (Note:  I made a half recipe in my pics shown below—great for a smaller family.  Or a midnight snack. Don’t judge…)
Next, in a separate bowl, prepare crumb topping by mixing dry cake mix and (cooled) melted butter.  Sprinkle crumb topping over mixture.
 
Bake at 350 degrees for 35-40 mins or until crumb mixture begins to turn golden brown..

Once cooled completely, frost cake with whipped cream. Best when served with hot cocoa and other fall favorites—

---------------------------------------------------------------------------------------

YUM! Thanks Nickie.

10.18.2012

Super Soft Sugar Cookies

Last October my friend Crystal introduced me to the idea of making and decorating sugar cookies for each holiday.  I thought this was the coolest thing ever!  Not that my childhood was deprived because we didn't do this.  My mom made chocolate chip cookies on a weekly basis.  No lie.

Anyway, she gave me her yummy recipe and I'm determined to start this tradition.  We made the cookie dough and then a few days later rolled it out, cut, baked and decorated the cookies.  I wanted my kids to be in love with the cookie cutters and decorating them.  They could have cared less about the whole thing.  Maybe in a few years they'll appreciate the tradition that I desperately want to start.


Soft Sugar Cookies
1 c. sour cream
1/2 tsp. baking soda
1/2 tsp. salt
1 tsp. vanilla
3 eggs
1 1/2 c. sugar
1 c. vegetable oil
1 T. baking powder
4 1/2 c. flour

Beat soda into cream.  Add salt, vanilla, eggs, sugar and oil.  Add dry ingredients.
Mix well.  Dough should be a little stiff.

 Roll dough in plastic wrap and place in the refrigerator for at least four hours
(or the freezer for two) before baking.

*I made the full recipe and it made a lot of cookie dough.  I separated it into two different rolls - put one in the freezer and one in the fridge.  The freezer one can last up to 4 months!*

The next few steps of the cookie making process is all about flour.
Be sure to have extra flour on hand.
1 - Grease 2 cookie sheets.  Preheat oven to 350 degrees.

2 - Sprinkle flour onto a board, counter, table, etc.  Unwrap cookie dough and put it on the counter.  Sprinkle more flour on top and on a rolling pin.  Roll out cookie dough.
Not too thin, or you'll have crisp cookies. (which I did...oops).


3 - Then start cutting!  It's good to have a metal pie scooper on hand.  This works perfect to scoop up each individual shape and place onto the greased cookie sheet.

4 - Place full cookie sheet into the oven for about 6-8 minutes.
You want the cookies to puff up.  Don't let them get brown around the edges.
5 - Place cookies on a cooling rack.
6 - Combine the leftover pieces of the cookie dough.
Sprinkle more flour on top and rolling pin and repeat 1-6 until the cookie dough is gone.
And then, don't forget the best part!

DECORATING!

And if you have too many, wrap them up in Halloween gift bags and treat your neighbors!

----


AND...did you know today is National Cupcake Day?  Make some cupcakes.  Maybe even these.

10.15.2012

Chicken Broccoli Alfredo

I wish my kids loved this as much as I did.  I made it last week and my toddler cried because it wasn't macaroni & cheese.  My baby picked at it and then said "more".  She wanted a different kind of food.  Dangit.
Regardless, my hubby and I love it.  Try it - maybe your kids will like it?
Chicken Broccoli Alfredo
2 chicken breasts
2-3 T of butter
1 clove of garlic
1 stalk of broccoli
1 jar of Alfredo sauce (you choice)
a package of fettuccine noodles
Parmesan cheese, salt and pepper to taste

CHICKEN
Put butter into pan and turn to medium heat.  Crush garlic and begin sauteing in the butter.  Cut chicken into bite size pieces.  Put chicken into pan.  Salt and pepper.  Cook for about 10 minutes on medium heat.  Stirring occasionally.  Once the chicken is lightly brown, add a few tablespoons of water.  Be sure to scrap all the butter off the bottom of the pan and mix it in with the water (helps with the flavor)  Add the jar of Alfredo sauce.  I like Ragu - Roasted Garlic Parmesan.  Simmer for a few minutes.

PASTA
Boil your pasta :)

BROCCOLI
Cut broccoli crowns off of the stalk.  It's better when they're in smaller pieces.  Place in a saucepan with 1/2 c. of water.  Bring the water to a boil, cover, and simmer on low for about 10 minutes.
Drain pasta and broccoli and combine everything into a large bowl.  Mix it up, add Parmesan cheese.
 Done! :)
I've never been able to make an Alfredo sauce from scratch that I like.  Do you have one?!  I would love to try it.  Send it to me @ willtherebefoodthere@gmail.com and I'll post it linking back to you!

10.12.2012

Follower Friday: Peanut Butter Cup Cookies

 
Today's post belongs to Laura.  We've been friends since we were 13.  We both grew up in PA - yeah!  And even after we went to college (four hours apart in the West) we still made it a priority to see each other every couple semesters.  She's beautiful, creative and I've always been jealous at how comfortable she is in any situation.  She also has her own food blog - check it out!

--------------------------------------------------------------------------------------------------------


I feel so honored to be featured on Tiffanie's blog!

My name is Laura Larson,
  And Tiff and I met many years ago at girl's camp.

Funny story actually!
During our 1st year at girl's camp,
she totally (accidentally) walked in on me in the bathroom.
Awkward!
We didn't exactly strike up a conversation right then and there.

So it wasn't until the following year that we made the connection 

"Hey, you're that girl who...."

And we've been really good friends ever since!

She makes me laugh more than any girl I know!
I admire how she's always been herself 
and well, she's just Fabulous!

Anywho, enough about Tiff! :)

This cookie recipe that I'm featuring is one of my top 3 favorite holiday cookies ever!
My mom made it one Christmas and I've never forgotten it. 

I mean look at it, this is a decorative cookie that can be used for either
Halloween, Thanksgiving or Christmas.

I have a blog called The Cookie Jar, All things BAKING, that you can visit HERE.
Please come by and visit for more cookie recipes or pies, breads, muffins etc.

Or simply to say hello. I'd love to meet you!

Thanks for having me Tiff!

Ingredients:
makes 3 dozen
1 cup semi-sweet chocolate chips
2 squares (1 ounce each) unsweetened baking chocolate
1 cup sugar
1/2 cup butter or butter shortening
2 eggs
1 t. salt
1 t. vanilla
11/2 cups + 2 tablespoons all-purpose flour
1/2 t. baking soda
3/4 cups finely chopped peanuts
36 miniature peanut butter cups, unwrapped
 Instructions
  1. Microwave 1 c chocolate chips and 2 squares (1 oz each) baking chocolate for 2 minutes. 
  2. Repeat until smooth (or melt on rangetop in small saucepan on very low heat).  
  3. Allow chocolate to cool slightly.
  4.  In a separate bowl combine sugar and 1/2 cup butter in large bowl. 
  5. Beat 1 c sugar and 1/2 c butter.  Beat in 2 eggs, 1 tsp salt and 1 tsp vanilla.
  6. Add melted chocolate slowly.  Mix until well blended.
  7. Stir in 1 1/2 c + 2 Tbsp flour and 1/2 tsp baking soda. 
  8. Shape dough into 1 1/4 inch balls.  Roll in nuts.
  9. Place 2 inches apart on baking sheet lined with parchment paper or silpat.
  10. Bake at 350 degrees for 8-10 minutes.  
  11. Immediately after taking out of oven, Press peanut butter cup into center of each cookie
  12. Cool 3-5 minutes on baking sheet before removing to cooling rack.
Drizzle
  1. Place peanut butter chips in heavy resealable sandwich bag. Seal. 
  2. Microwave for 1 minute.  Knead bag.  
  3. Repeat until smooth (or melt by placing bag in hot water). Cut tiny tip off corner of bag. Squeeze out and drizzle over cookies

Microwave 1 c chocolate chips and 2 squares (1 oz each) baking chocolate for 2 minutes. 
Repeat until smooth (or melt on rangetop in small saucepan on very low heat).  
Allow chocolate to cool slightly.

 In a separate bowl combine sugar and 1/2 cup butter in large bowl. 
Beat 1 c sugar and 1/2 c butter.  Beat in 2 eggs, 1 tsp salt and 1 tsp vanilla.
Add melted chocolate slowly.  Mix until well blended.
Stir in 1 1/2 c + 2 Tbsp flour and 1/2 tsp baking soda.
Shape dough into 1 1/4 inch balls.  Roll in nuts.
Place 2 inches apart on baking sheet lined with parchment paper or silpat.
Bake at 350 degrees for 8 minutes.

Immediately after taking out of oven, Press peanut butter cup into center of each cookie
Cool 3-5 minutes on baking sheet before removing to cooling rack.


Drizzle
Place peanut butter chips in heavy resealable sandwich bag. Seal. 
Microwave for 1 minute.  Knead bag.  
Repeat until smooth (or melt by placing bag in hot water). 
Cut tiny tip off corner of bag. Squeeze out and drizzle over cookies.


---------------------------------------------------------------------------------------------------------

Chocolate and peanut butter...my favorite dessert combination!
HAPPY WEEKEND! :)